How To Add a Photo to the Forum

Go Back


There are two ways to make your photo available to the forum members.

Attachment Method

Use Attachment Manager to upload image files to the CPS server and make them available as links at the bottom of your post. 
 
Users may click on the "Attachments" links to view the photo  A new window will open in their browser displaying your photo.  The advantage of this method is that you are limited only to a total picture size of about 1mb (about 1024x768 pixels).

  To show the image in the post text you can copy the URL when viewing a picture, go back and edit your post, then paste the URL with image tags.

IMPORTANT: If you type the img tags manually there must NOT be a space between the tag brackets and the URL

PAY ATTENTION HERE--> do not right click a thumbnail image in the attached file list before the post is submitted because before committing the post everything is still in a temp area. You MUST Post your reply in order to finish moving your attachments to final storage.

Once you Post you can right click the Attachment manager thumbnail image and copy the address. If there is more than one image attached is easiest if you paste URLs for each image into a simple text editor before you start to edit the post. So if you have four images you will right click/copy/paste four URLs in the text editor.

Then go BACK and edit your post. Go to where you want the picture to appear in your text and paste the URLs where you want them. Then put opening and closing image tags on either side of each URL to display the image or use the button on the bar to add the image tags for you. It is many more steps than the inline image upload but it will allow bigger pictures than the standard 800x600 pixel size


Correct
[img]http://www.cessna-pilots.net/forums/ubbthreads.php?ubb=download&Number=30024&filename=sect_9_4835.jpg[/img]

Incorrect
[img] http://www.cessna-pilots.net/forums/ubbthreads.php?ubb=download&Number=30024&filename=sect_9_4835.jpg [/img]

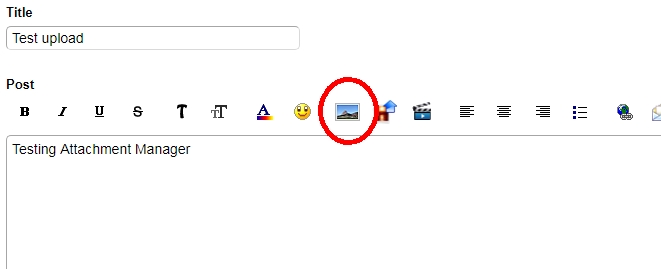
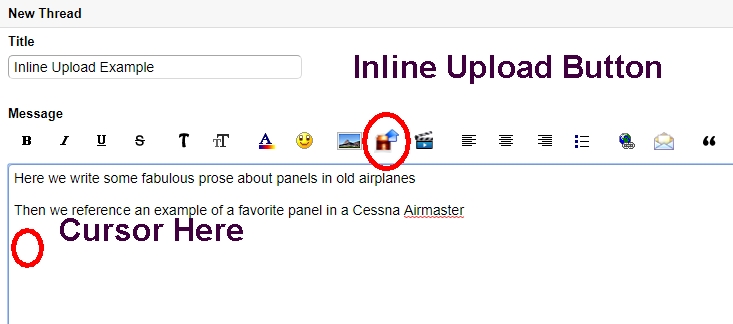
 If you do not want to type in the img tags manually you can use the image link button from the tool bar. It is the picture of a mountain and blue sky to the right of the smiley button.

When you click it a box pops up

In this small window, place your cursor in the window and Right-Click (or ctrl-V keyboard shortcut), Paste.  If all goes well, you should see the text area of this box filled with the previous copied image location information.

Note: Ensure you have only one http:// not http://http:// in front of your image link.

The link URL MUST be copied from a page where you were viewing the picture, or a Right-Click/copy URL from the attachment thumbnail.

 Click 'OK' to close the window and embed the link in your post with the UBB [img] tags.

One URL per cycle. Note that img tags do not care where the URL points to as long as the .jpg or .png image file is accessible from the internet without a login. The image can be on your own server.


Inline Upload

The image may be uploaded and embedded as you write your post and when viewed will be displayed inside your post text.

This is a nice way to present your photos because users don't need to use Attachment Manager and double edit their post. There are limitations to this method - The Inline Upload automatically resizes picture to 800x600 pixels. The maximum size for pictures input prior to automatic resizing is 5mb. You may need to resize your photos to be less than 5mb before using the Inline Upload method. Many of us use Irfanview as a free tool to crop and resize photos.

With inline upload there are two steps for every picture. You select the picture to upload with the choose file button. That step ONLY puts the path and file name into the window. The second step is to click "Add File From Your PC" to actually accomplish the upload.

Step 1: Get a local file path and name into the window (You can type it in if you want)

Step 2: click the button to the right to upload the file name in the window to the CPS server

Repeat for as many pictures as you want up to 20 max

Last step: Click All Done to exit the upload routine and place the image tags with URL to the picture(s) into the post.


[img]http://www.cessna-pilots.net/forums/ubbthreads.php?ubb=download&Number=30024&filename=sect_9_4835.jpg[/img]


Step-by-Step How To Use the Inline Photo Upload

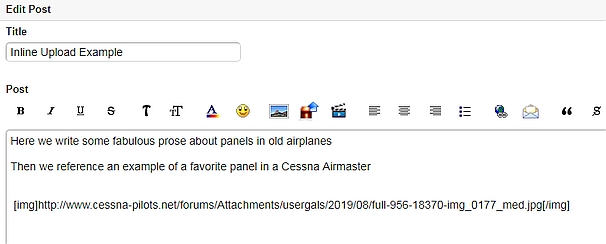
Step 1:

Place the cursor in your text where you want the image to appear. And click the image upload button


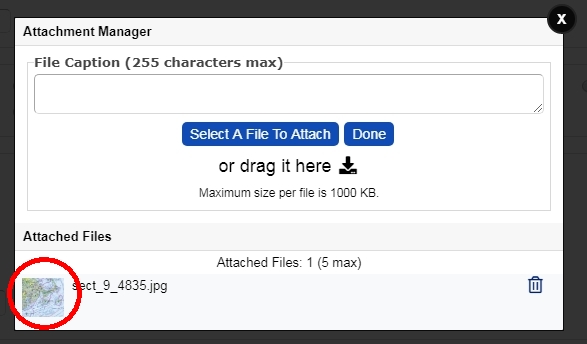
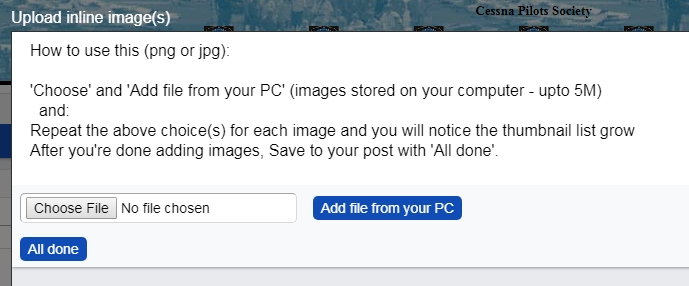
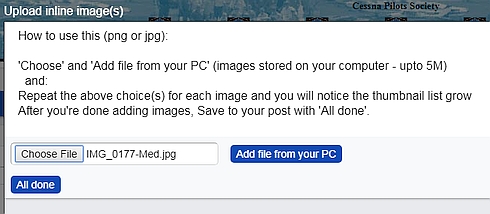
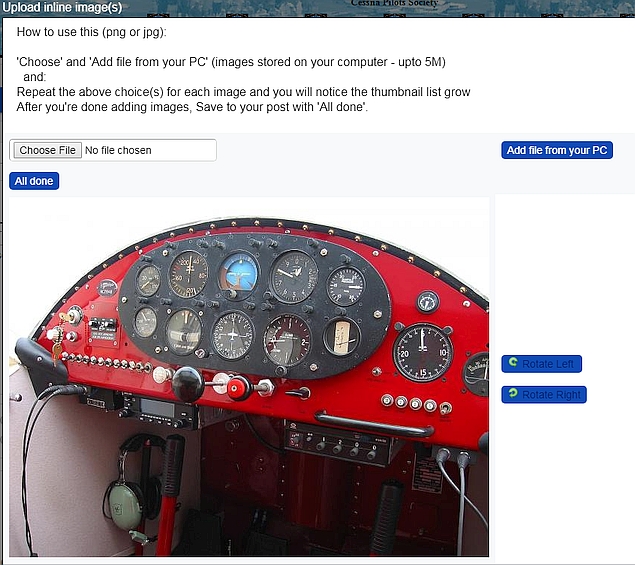
Step 2:

In  the Upload inline image(s) box there are two steps for every picture. You select the picture to upload with the choose file button. This step ONLY puts the path and file name into the window.


The next step is to click "Add File From Your PC" to actually accomplish the upload.

Repeat for as many pictures as you want up to 20 max.
When each image is uploaded you will have the option of rotating the image left or right. This helps solve the Apple "upside down" image problems.

Last step: Click "All Done" to exit the upload routine and place the image tags with embedded URL for picture(s) into the post. If you click "All Done" before "Add file from your PC" you will be returned to your post and there will not be an image URL inserted in the post.


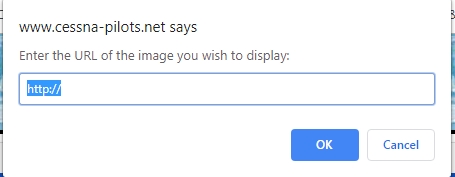
NOTES:

You may Preview your post with the embedded photo and then Click the 'Change Post' button.

Click the Attachment Manager link in the edit mode to add or delete an attachment to the post

You may use the embed image button to display any photo that is accessible over the Internet with a valid URL.

Please be considerate of users that have slow Internet connections: Do not link to pictures larger then 1024x768 and preferably 800x600 or 640x480.  

As an alternative to attaching files or embedding a URL to an external URL, consider putting a link (earth with chain ink button) into your message text that links to an image of any size anywhere on the Internet. It will not display your image in the post but will display the image in the browser if the user clicks on the link. This allows users to view images stored on another server without any limitations on size or pixel width.